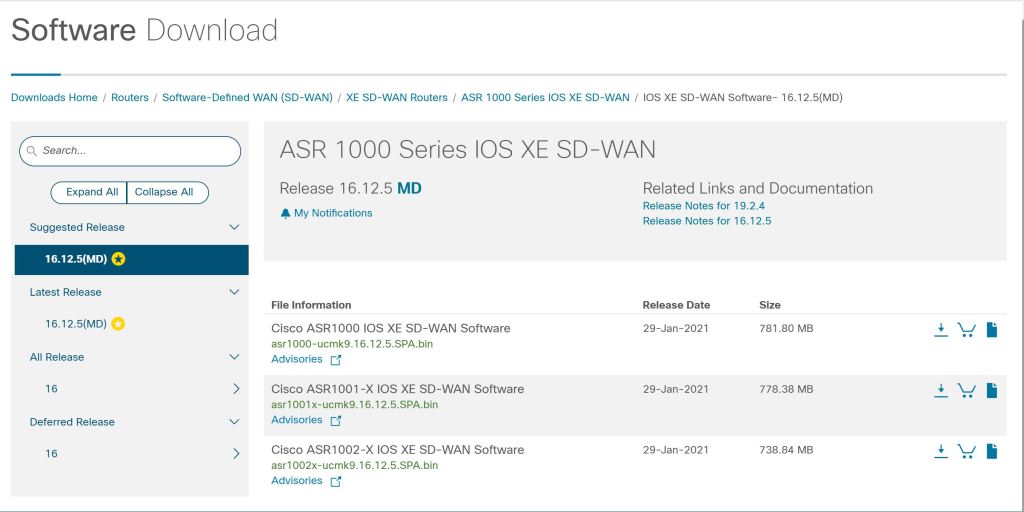
For this lab, the plan is to convert an ASR 1001-X over to SD-WAN code (I’m using 16.12.5 SD-WAN code, instead of the 17.x universal code, so I can test upgrading the router later.) and get it added to the SD-WAN deployment. The steps are pretty straightforward:
- Re-image the device.
- Stop the PNP service.
- Apply the base config to reach the vBond and apply the root cert.
- Add the vBond profile on cisco.com.
- Add the device to your inventory on cisco.com.
- Sync vManage with your Smart account.
Re-image the Device
Re-imaging the device is the same as an IOS change. Just download the image from cisco.com, TFTP it to the router, and change the bootvar to point to the new image. I’m not going to go into the details, since it’s something that’s been documented a million other times.
Stop the PNP Service.
Once it comes back online, you have to kill the PNP service, since we’re not doing PNP during the part (we’ll get to that at a later part of the blueprint).
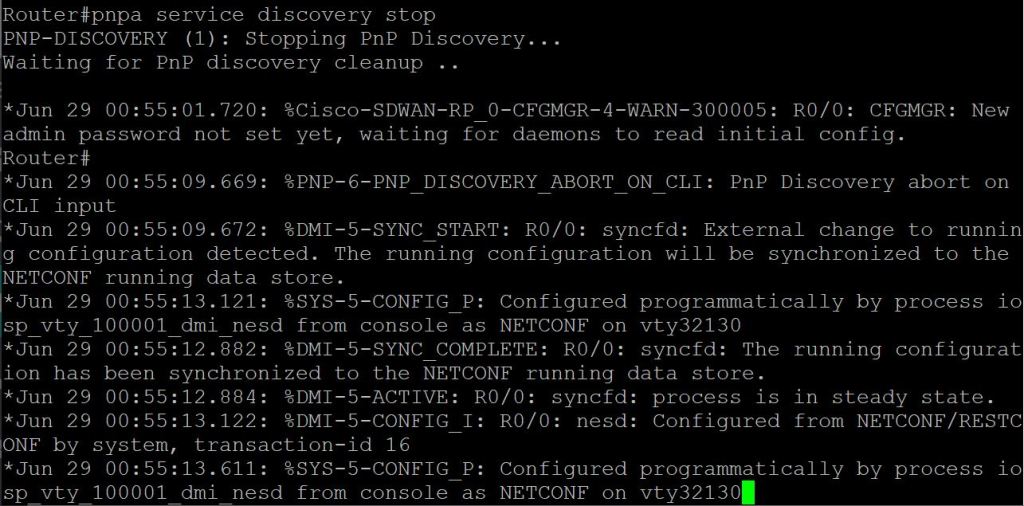
And give it a minute until you get the “all green”.

Apply the Base Config
Then we just do some basic config, except it’s the Bizarro World version of IOS commands.
! First just configure the system info. You can’t do config t, it has to be config-t.
config-transaction
system
host-name ASR1001X-AA
! system-ip is our unique device identifier.
system-ip 192.168.250.13
site-id 100
! org name has to match your SD-WAN deployment.
organization-name MY-ORG-NAME
vbond 192.168.150.173
! Then we’ll configure the tunnel interface.
interface tunnel 0
! Definitely copy and paste the interface name. I noticed it doesn’t like to tab it out sometimes.
ip unnumbered GigabitEthernet0/0/0
tunnel source GigabitEthernet0/0/0
! I initially left out this tunnel mode command, and the config wouldn’t commit. I got an error.
tunnel mode sdwan
! Then configure the underlay interface and default route.
ip route 0.0.0.0 0.0.0.0 192.168.103.1
interface GigabitEthernet0/0/0
ip address 192.168.103.2 255.255.255.252
! Finally, we glue the Tunnel 0 interface to the Gig0/0/0 interface. This is the part where you definitely have to copy and paste the interface name.
sdwan
interface GigabitEthernet0/0/0
tunnel-interface
encapsulation ipsec
color biz-internet
allow-service all
The error I got when I left off the tunnel mode was:
Aborted: ‘sdwan’: Sdwan interface GigabitEthernet0/0/0 doesn’t have tunnel
Fixed it by adding the tunnel mode sdwan command on the tunnel 0
One more thing. We need the enterprise root cert loaded onto the router. Without it, you’ll see a CRTVERFL error when you do the show sdwan control connection-history command.

Copy the root certificate to the router.
copy tftp://{tftp-server-ip}/root.cer flash:
request platform software sdwan root-cert-chain install bootflash:root.cer
Verify it with show sdwan certificate root.
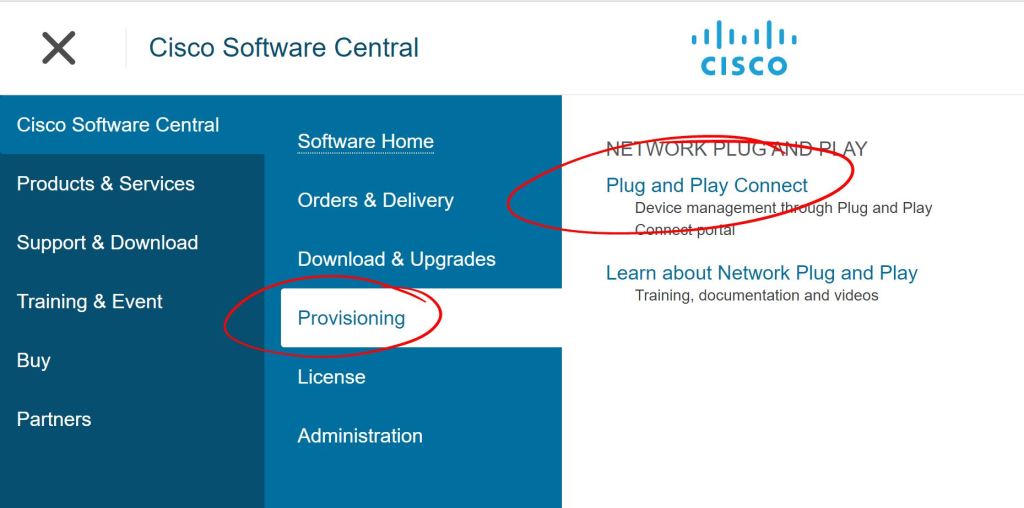
Add the vBond Profile
Go to the Provisioning > Plug and Play Connect section of cisco.com.
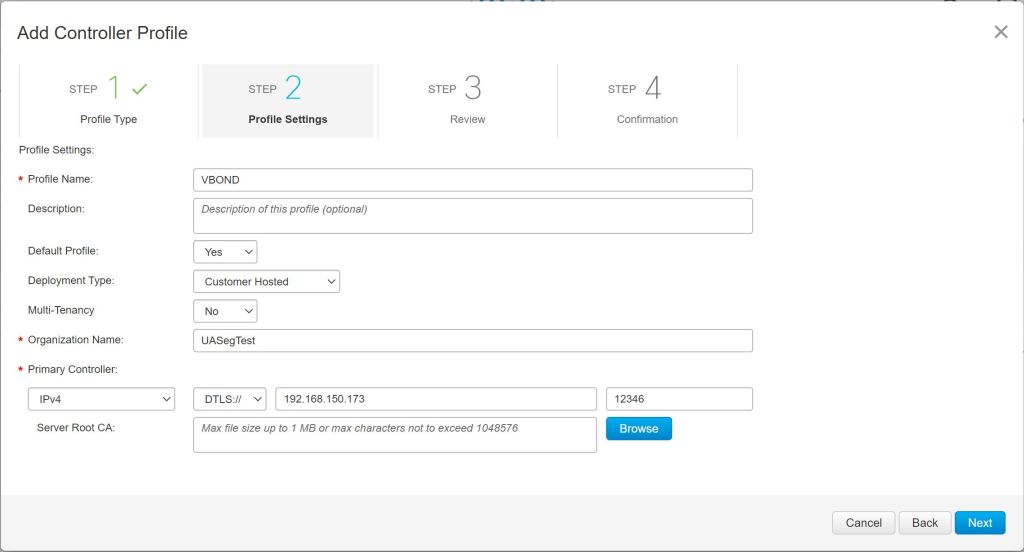
You have to create a default Controller Profile first. Click the Controller Profiles tab and hit Add Profile. Choose vBond as the Controller Type. Then fill in the fields as shown below. The Primary Controller IP doesn’t need to be reachable publicly. It just needs to be reachable by the WAN Edge that you’re labbing with. However, vManage will need to be able to reach cisco.com to sync things up.
Add the Device to Inventory on Cisco.com
Then we go over to Devices and click Add Devices.

Choose to Enter Device info manually and click Next. Then click Identify Device to add a device. Enter the Serial Number, Base PID (device type), and select the Controller Profile (the one we just configured above).
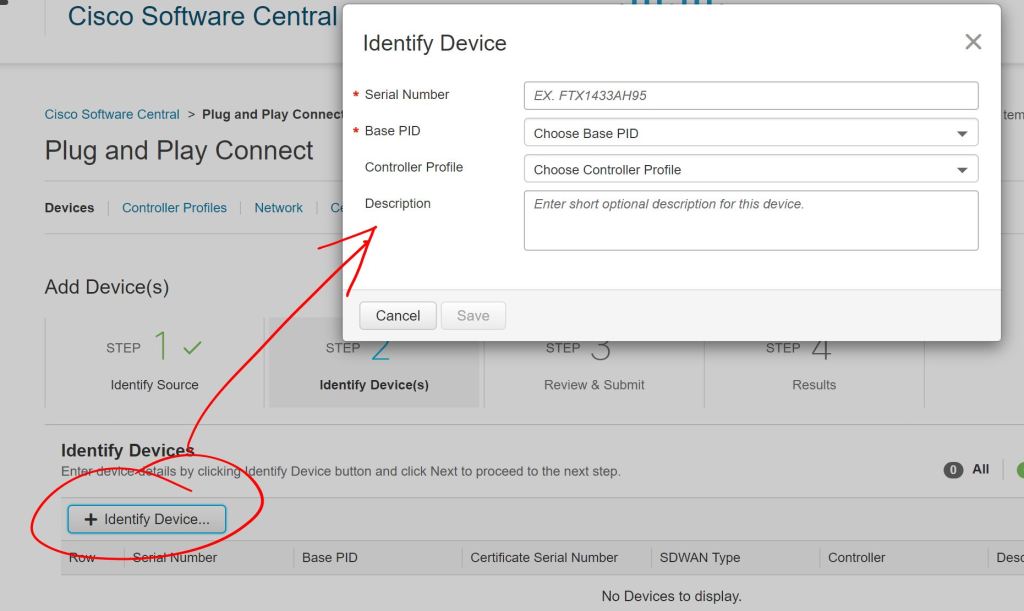
IMPORTANT
I really screwed up big time and put in the wrong Serial Number (shown as Chassis ID on SDWAN) but the correct Certificate Serial Number. I’ll show the details at the bottom of this post.
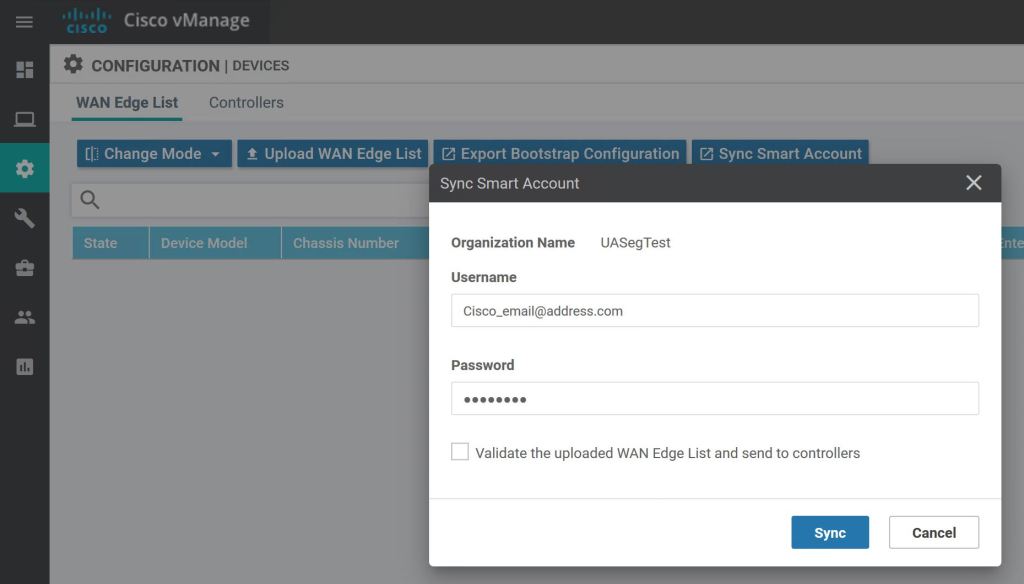
Sync vManage with Cisco Smart Account
On vManage, go to Configuration > Devices > Sync Smart Account. In the pop up, enter your Cisco Smart Account credentials.
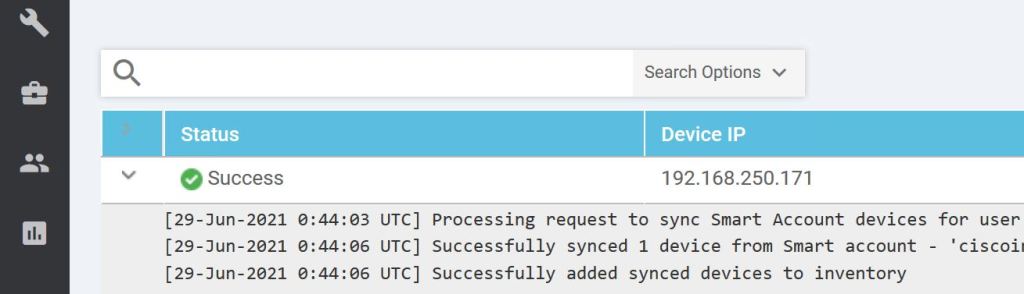
We can view the progress by clicking the little arrow to the left.
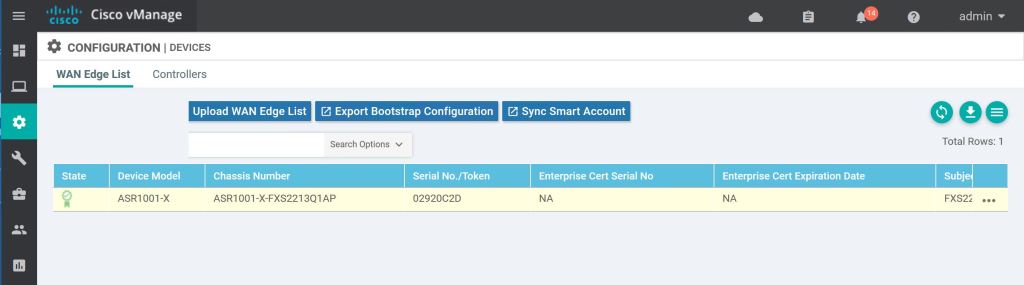
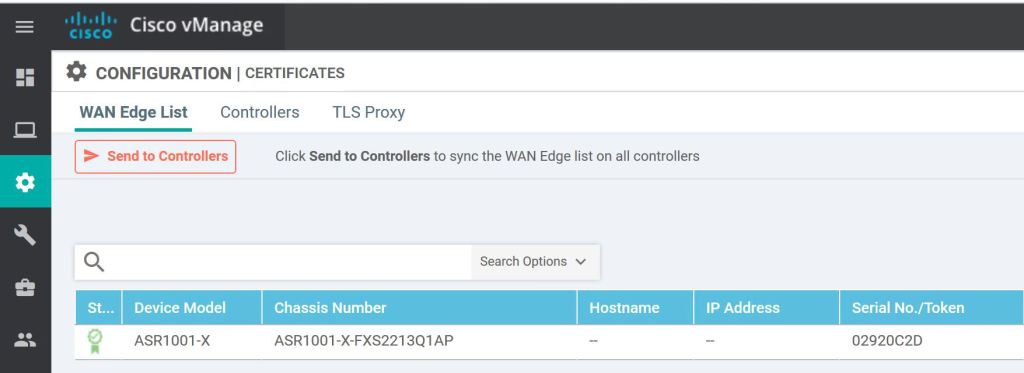
And just like magic, it should pop up in our device list.
One more thing, we need to hit Send to Controllers on the vManage Configuration > Certificates page.
We should see the successful handshake on the WAN Edge router.

Let’s also do a show sdwan control connections. It’s pretty messy on the default putty window size.

Troubleshooting
I struggled quite a bit to get this to work the first time. As I mentioned earlier, I made a mistake with the device serial number. I tried to just create a second device with the correct serial number and the same certificate serial number, but vManage failed when I tried to sync it up. Then I tried to delete the original WAN Edge from vManage by invalidating it and then deleting it, but it was stuck. I kept getting an error that things were out of sync (even though everything showed up as in sync). I found a couple bugs related to not being able to delete WAN Edges, but I didn’t want to waste anymore time. So I blew away vManage and started from scratch. I figured I needed the practice bringing everything up from the beginning. I was able to build out vManage, join the vBond and vSmart, and get the WAN Edge connected in about 25 minutes total.
Verify Chassis-Num and Serial-Num
Verify the chassis-num/unique-id and serial-num match what’s configured in your Smart Account/Plug and Play page from cisco.com or from vManage Configuration > Devices.
show sdwan control local-properties
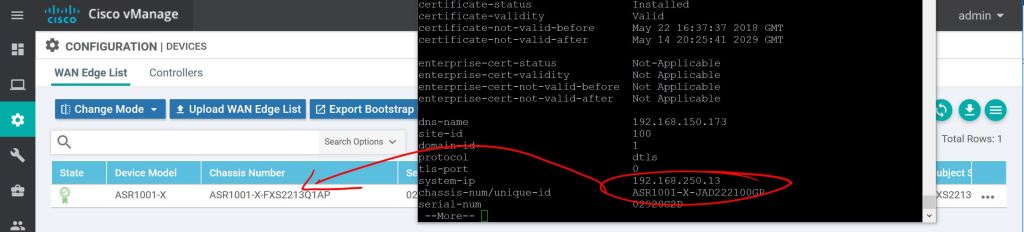
Just to reiterate, use the local-properties command to see what you need to put in when you’re adding devices, don’t just do a show inventory and grab the wrong serial number like I did.
Check Validate Setting
Another thing to check is the Validate column on the vManage Configuration > Certificates page. You have to scroll the little tiny scroll bar on the bottom over to the right to see it. It’s easy to miss.

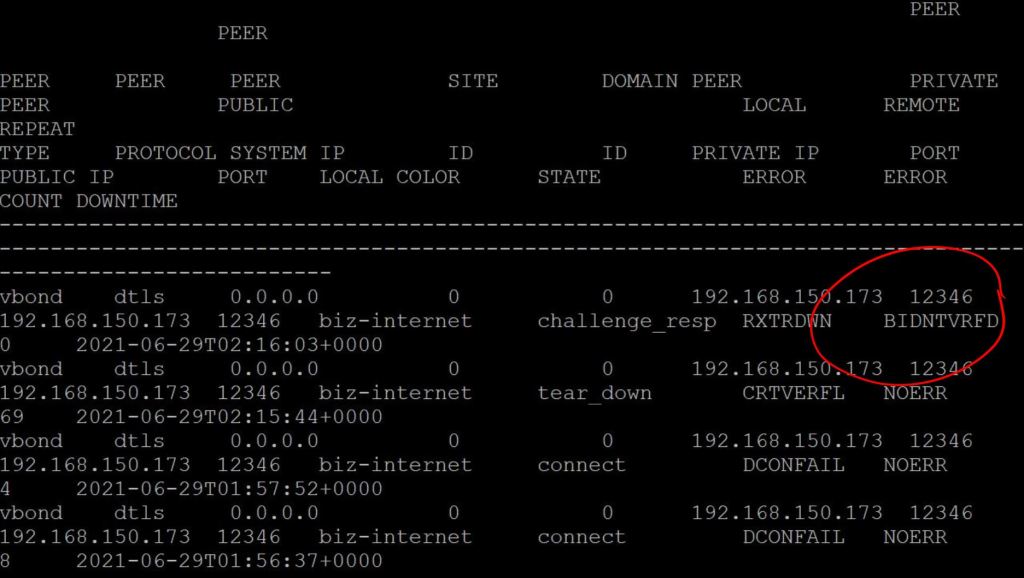
When you’re syncing vManage with your Smart Account, there’s a checkbox which will set the router automatically to the Valid setting, which is like sending it straight to production.

If you don’t check that box and you leave the router in the Invalid state, you’ll see the BIDNTVRFD error on the connection-history. Obviously, that stands for Board ID Not Verified.
2.2.b ii Orchestration with zero-touch provisioning/Plug-And-Play
The WAN Edge router needs to talk to the organization’s vBond in order to get onboarded. How does router know how to find the vBond? There are two options. The first is what we did above, you apply a minimal config manually. The second option is for everything to happen automatically with Zero-Touch-Provisioning (Viptela) or Plug-and-Play (Cisco). The PNP process is pretty straightforward:
- You cable the router up and power it on.
- The router gets an IP address/default route/DNS server from DHCP.
- The router phones home to ztp.viptela.com (DTLS for Viptela) or devicehelper.cisco.com (HTTPS for Cisco) and gets authenticated.
- The public vBond (e.g. devicehelper.cisco.com) tells the router how to find its own organization’s vBond.
- The router talks to its own vBond, authenticates, gets the info for vManage and vSmart, and gets the config push from vManage.
